

How Do I Update WordPress Site & Plugins?
Step 1
The first step to updating your WordPress installation is to take a backup! While the update process is quick and easy, it is vital to have a fresh, up-to-date backup of your installation and database. Be careful to not be caught off guard by a rogue plugin or outdated theme file; they can break your site if the change is too drastic.
Step 2
Step 3
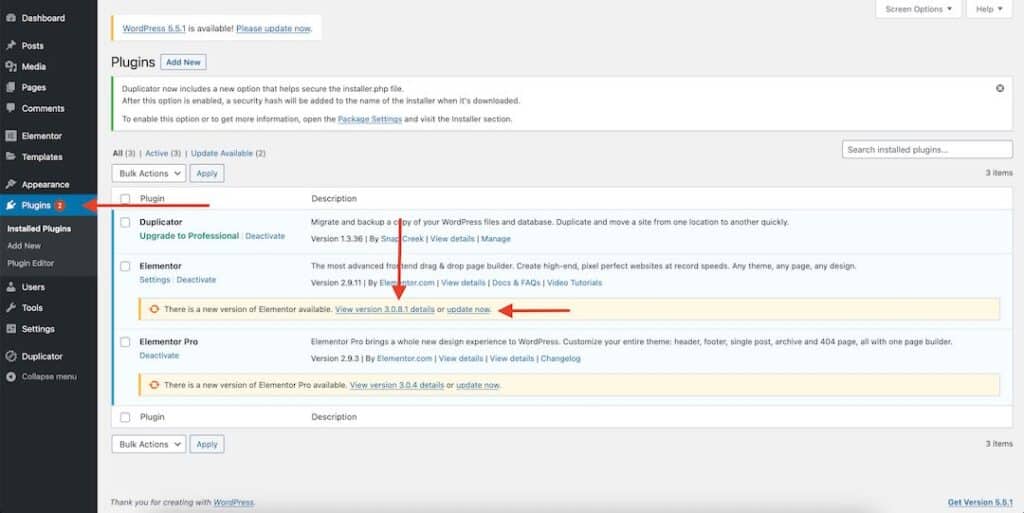
Once we navigate to the plugins page, WordPress will present you with a list of plugins and note which ones need to be updated. They will be signified by having a yellow bar underneath that says, “There is a new version [PLUGIN NAME] available. View version x.y.z details or update now.” Before you hit update, take note of the plugin’s details.
Many plugins have a compatibility check mark that denotes compatibility with your version of WordPress. We always recommend checking if a plugin is compatible with your site before updating.
Step 4
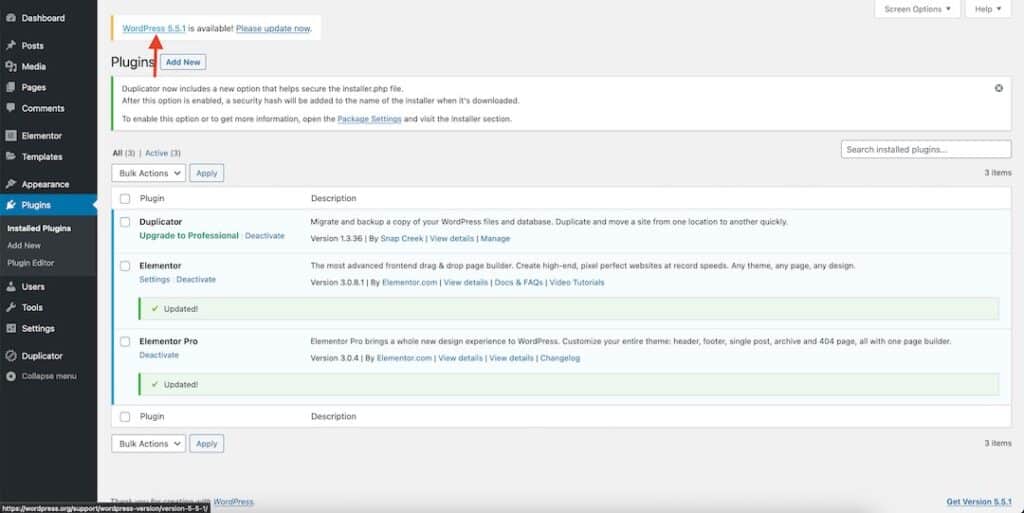
Once you have read the plugin details and verified compatibility with your WordPress version, proceed to click on the “update now” link. The plugin will finish updating, and the dashboard displays a green bar that says, “Updated!”
Step 5
Step 6
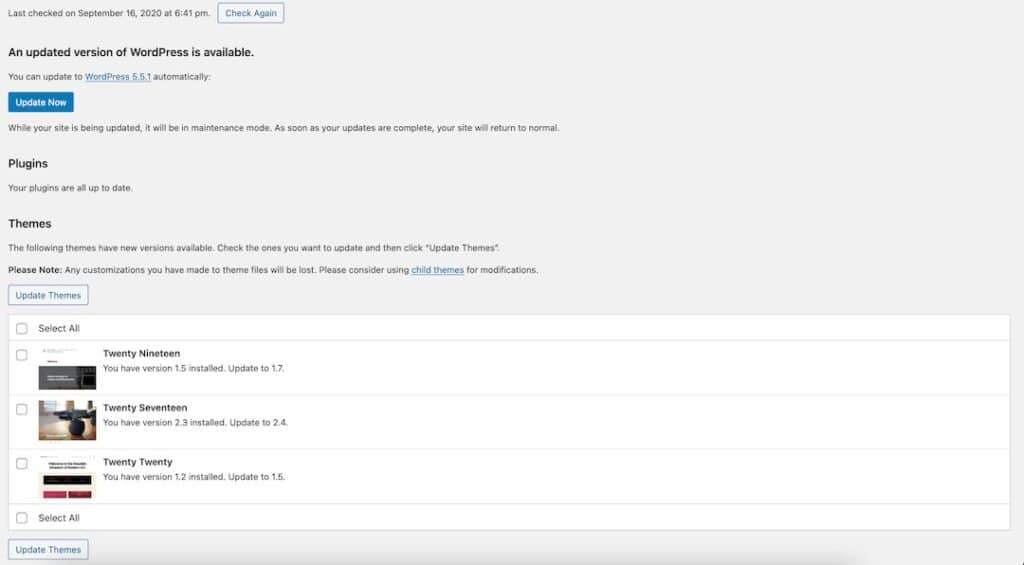
Once you have clicked on the link, WordPress will direct you to the updates page, where it will run a check to see what needs updating. The check will notify you of any themes or plugins that you might’ve missed during the last round of updates.
Step 7
Updating your WordPress installation and plugins is a fairly straightforward process that anyone could do. Updating your site ensures protection against cyber threats. It is important to note that without a backup, recovering a broken site is nearly impossible. My Website Spot provides a free guide on backing up a website that you can follow.
My Website spot is always willing to provide FREE advice. If you have any questions, need assistance with your site’s maintenance, or want to give us feedback on this article, We’d love to hear from you! Drop us a line, and we’ll get in touch!